__________________________________________________ __________________
Quit Half-Life and open up your Half-Life folder and suddenly you will see tons of .bmp (bitmap) pictures which you have printed/cut out. Now you need some serious program that will put all these pictures into a fully working movie. The name of the program you need is Video-Mach, download a evaluation copy at h**p://www.gromada.com/.
(1) Screen inserting .bmp files ("input video list"). After installation just go to the left downer screen which represent the "input video list" (all your printed/cut out .bmp files) and right-**** and then open. There you add all your printed/cut out .bmp files and now you can see on the upper left screen a screenshot. Simply use your up and down key or left or right key to roll the screenshots down all your inserted .bmp files to see a "preview" of your movie.
(2) Screen Inserting music files ("input audio list"). Video-Mach supports mp3 files. To add mp3 files simply go to the screen just beside the "input video list" to the right, this screen is called "input audio list". Simply do the same as you did in the previous screen, **** and open, add your mp3.
(3) Screen Inserting effects ("video effects list"). As I haven't tried these awsome cool techniques I have no idea how it is to be done. I think it won't be so complicated as Video-Mach is a relatively easy program where you just and your desired files, so the effects might be in the same way. If anyone knows please put up a tutorial.
With the above three screens you can add or remove desired files just as you like.
When you've added everything and want to go finalize your movie simply follow these steps:
There are buttons over the 2nd screen ("input audio list") which look like a floppydisc and a play button. Press the floppydisc button (output file and settings)
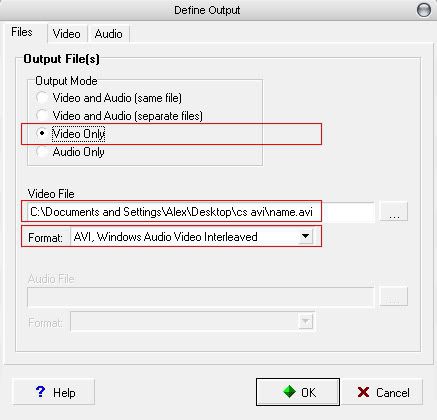
Select the File tab and do the following:
-choose output mode.
-choose a saving location and save the file as a .avi movie (avi format).
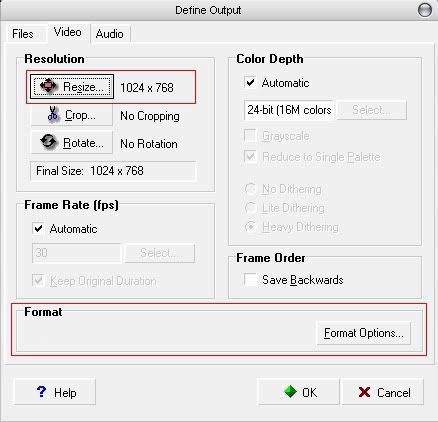
Video tab
-resize resolutions etc. as you prefere.
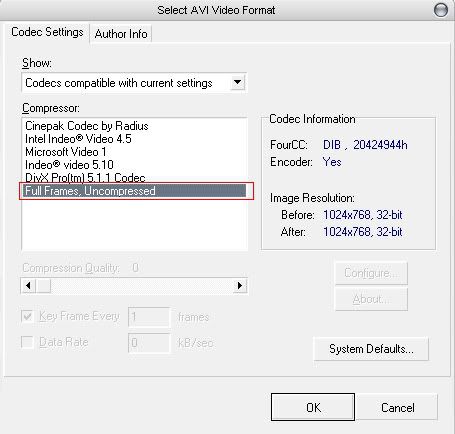
-a bit down you have a button called "format options", **** on it.
-then choose the divX codec for best result and performance (it is highly recommended!) there you can also reconfigure a lot of stuff like picture quality etc.
__________________________________________________ __________________________
NOW FOR THE PICTURE TUTORIAL.
This is for anyone who DID NOT understand the above written procedure.
You will need
- Half-Life/Counter-Strike (DUH)
- Videomach (URL mentioned above)
- VirtualDub (Search on google, its not a necessity just an option)
- VegasVideo (again an OPTION not important, if u r INTO editing the whole screens and inserting new frames then this software is for u, I m using Vegas5.0b)
- Audio Editor (Cool Edit Pro 2000 is a good one)
The Music
Having music is the all important part to a video, it sets the pace of the footage and gives a certain feel to the clip. I went through roughly 10 or 15 revisions on my clip until I found something I was happy with. This can be done with any simple audio editor, or in Vegas Video, Cool Edit Pro 2000 is the one I'm used to and used that.
- - - - - - - - - - - - - - - - - - - - - - - - -
The Demos
Once you have record a demo with some footage you want. Convert the demo to Bitmap files via the console in Counter-strike. Using the command startmovie avi 30 Startmovie being the command to convert to Bitmap files, Avi being the names of the Bitmaps for each frame (avi0001.bmp, avi0002.bmp) and 30 being how many frames per second are going to be used.
- - - - - -- - - - - - - - - - - - - -- - -
The Avis
Open Videomach and open the bitmap files that were converted from the demo. Delete excess bitmaps that arent needed.
**** on the save icon. This will bring up some menus to enter your settings in.
Give the AVI a filename, and select the AVI formats. All these can be found on the tabs.
To save the AVI file out of Videomach, **** the play button
I had some issues with the uncompressed AVI's that Videomach gave me, when I tried to use them in Vegas Video. So I would open the files in VirtualDub, trim any of the footage I didnt want, and save as a different filename in a folder of uncompressed, edited AVI's. This way all the same bitrates were used when I imported all the AVI's into Vegas Video.
Production
If you've had a look at Adobe Premier, its a good program, but not so easy to use. I got recommended Vegas Video 4.0 by Rulke a few months ago, and gave it a bash. Its very simple to use. If you have ever used acid loops or a similar type program from Sonic Foundry, you can get the grasp of this program quickly too.
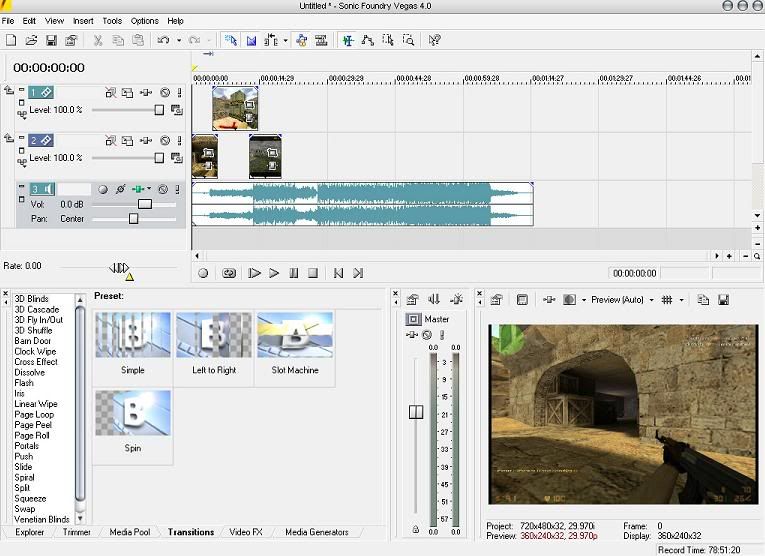
As you can see in the layout of Vegas, its pretty simple. All you cah to do is spend the time swapping some AVI's around to go in time with the music. Spend some time playing with it, theres lots of effects to play with and transitions between clips. Spend time experimenting with it.
When I saved my movie down when I was totally happy with what I had. I had experimented with different formats etc to look at quality vs the file size. I chose WMV, as it was good quality with a smaller filesize, and a lot smaller than AVI's.